
Post
By : Mutiara - Free Money From Blog
To get started with Blogger, visit the Blogger
homepage, enter your username and password, and click Sign in. Enter a display name
and accept Blogger's Terms of Service.
Then click the Create a Blog link and get started!
Pick a name and
address (URL) for your blog. Then, choose your favorite template (this is how
your blog will look when you publish it). Now get greative, add information to
your personal profile, and customize how your blog looks, if you feel up to it.
Start blogging now!
Write your post
Once you've signed in to Blogger, you'll see your dashboard with
your list of blogs. Here's what you need to do:
- Click
the NEW POST button and enter anything you want to share
with the world.
- Next,
you'll see the Create New Post page. Start by giving your post a title
(optional), then enter the post itself

When
you're done, click the Preview link to make sure it's
ready to go:

Once
you're satisfied with your post, click the Publish button.
This will publish your new post.
Add an image
You can add an image from your computer or the Web to your blog.
Click the image icon in the post editor toolbar. A window appears prompting you
to browse for an image file on your computer, or enter the URL of an image on
the Web.
- The
'Left', 'Center', and 'Right' options allow you to customize the way your
blog text will flow around your image.
- The
'Image size' options will determine how large the image will appear within
your post.
Click UPLOAD IMAGES to add your image, and then
click DONE when the notification window appears telling you
that 'Your image has been added.' Blogger will then return you to the post
editor, where you'll see your image ready to be published to your blog.
You can also publish images to your blog using your mobile device,
Google's free photo software Picasa, or a third-party service like flickr.
Add a video
To add a video to your blog post, click the film strip icon in the
post editor toolbar above where you compose your blog text. A window appears
prompting you to 'Add a video to your blog post.'
Click Browse to select the video file from your
computer that you'd like to upload. Note that Blogger accepts AVI, MPEG,
QuickTime, Real and Windows Media files and that your video must be less than
100MB in size.
Before uploading your video, add a title in the 'Video Title' box
and agree to the Terms and Conditions (you'll only have to do this the first
time that you upload a video with Blogger). Then click UPLOAD VIDEO.
While your video uploads, you'll see a placeholder in the post
editor showing where your video will appear. You'll also see a status message
below the post editor letting you know that your upload is in progress.
Depending on the size of your video, this usually takes about five minutes.
When it is complete, your video will appear in the post editor.
Customizing your layout
Your template is a fun way to customize your blog. When creating a
new blog, you're first asked to choose a default template, this is the basic
design of your blog. You can choose from customize your blog's design using our
intuitive drag-and-drop interface. You can also add powerful gadgets such as
slideshows, user polls, or even AdSense ads. Changing the fonts and colors on your blog is easy too.
If you want more precise control over your blog's layout, you can also use the
Edit HTML feature. To edit your blog's layout, follow these steps:
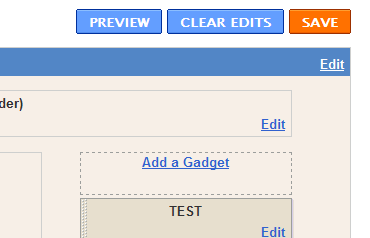
- Click
the Layout link from your dashboard below the blog you would like to
customize.
- From
the Page Elements sub-tab, click Edit to
edit existing gadgets, or Add a Gadget to add new ones.
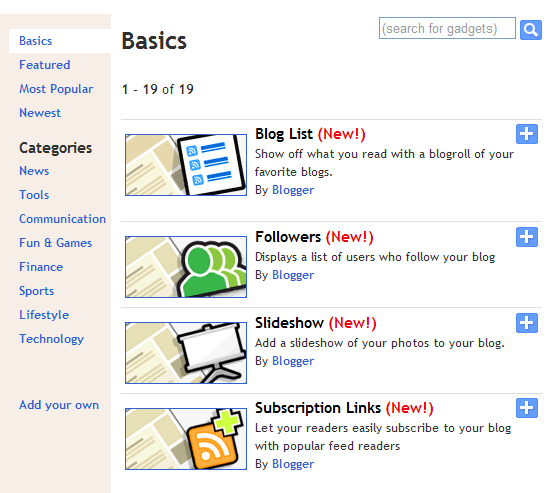
- To
add a new gadget after you've clicked Add a Gadget, simply
click the plus sign next to your desired gadget. You can choose from
gadgets by category, or search for a specific gadget in the top right of
the pop-up window.
Once you've added the necessary
information to your selected gadget, click SAVE. Your
layout changes will appear instantly.
Privacy and permissions
By default, your blog is completely public, and can be read by
anyone on the internet. However, if you want to keep it private, you can do
that, too. You cna change these settings on the Settings | Permissions tab.
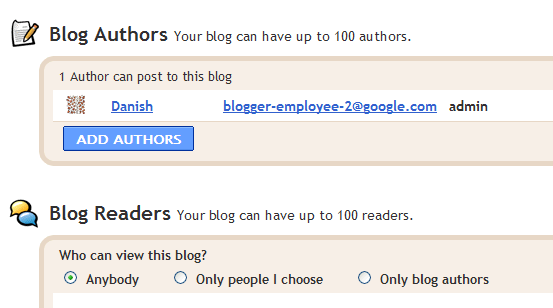
- Under
the 'Blog Readers' heading, you'll probably see 'Anybody' selected as the
default. When you change this to 'Only readers I choose,' you'll get an Add
Readers button.
- Click
the Add Readers button and then enter the email address
of a person to whom you'd like to grant access to your blog. To add
multiple people, separate their addresses with commas.
- For
each address entered, the Google Account associated with that address will
be given access to view your blog. If an address is not associated with an
account, that person will receive an invitation email with a link allowing
them do one of three things:
- Sign
in to an existing account.
- Create
a new account.
- View
your blog as a guest (no account required).
Follow other blogs
With the Blogger Following feature you can keep track of the blogs
you follow via your Reading List on the Blogger dashboard. There are
several ways to become a follower of a blog. One of the easiest ways is to
visit a blog that has added the 'Following' widget, ad then follow these steps:
- Click the FOLLOW THIS BLOG link under the 'Followers' widget.
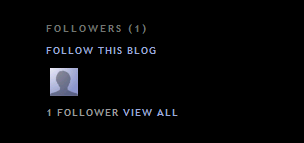
- You'll then see a pop-up window with the options to either follow publicly or anonymously.

- Select how you'd like to follow the blog, then click the orange FOLLOW button. You're now a follower of the blog! If you chose to follow the blog publicly, your profile picture will be displayed on the blog with a link to your Blogger profile.
- When you become a follower of a blog, the blog will also be added to your Reading List on your Blogger dashboard. Additionally, you can become a follower of any blog or URL (even if the blog doesn't have the 'Followers' widget) by adding the blog to your Reading List on the dashboard.
No comments:
Post a Comment